When importing a MIDI file the instrument tracks are analyzed to find the harmonies to set up the Master Track chords. Once the Master Track chords are detected the content of the MIDI tracks are converted to (chord and scale) relative form. The advantage of the relative form is that notes are independent of the harmony and scale. The challenge of importing a MIDI file is trying to find out which tracks to include in harmony analysis. Fortunately the 'Import' button can be used again many times if you find that the detected chords are too complex.
Step 1: Click on the 'MIDI Import' tab.
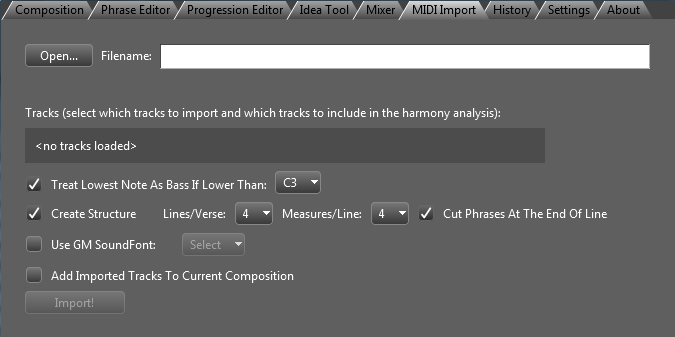 |
Step 2: Open the MIDI file to import.
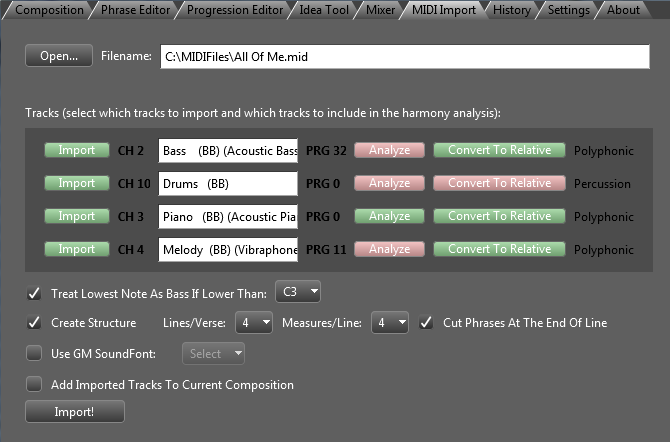
Click on the 'Open' button and use the file selector to locate the MIDI file.You will see information about each track: MIDI channel, track title (if it had one), midi program change as well as a preliminary track analysis result is displayed with buttons that influence the importing process.
 |
Step 3: Select the tracks to import.
Click on the  button to enable/disable importing that track. If the button is red, the track will not be imported.
Step 4: Decide which tracks to analyze for harmonies.
Click on the button to include/exclude that track in harmony analysis. If the button is red, the track will not be analyzed. The percussion track is automatically excluded. It is advised - depending on the content - to exclude melody or bass tracks too otherwise the detected chords will be very complex.
Step 5: Decide which tracks to convert to relative form.
Click on the button to enable/disable converting that track. If the button is red, the track will not be converted. It is best to convert all tracks except for non-chromatic percussion.
Step 6: Set other options
Options and explanations:
| Treat Lowest Note As Bass If Lower Than: | When there is no separate bass track, you can help the harmonizer to treat certain notes as bass. Specify the highest note to be treated as bass note. |
| Create Structure: | It is possible to subdivide the MIDI tracks into lines and verses. Specify lines per verse, and measures per line. The beats per measure value is read from the MIDI file. |
| Cut Phrases At The End Of Line: | When checked, instead of creating one long phrase to store all notes in a MIDI track, one phrase is created for each line. Note that if there are long held notes across line boundaries, enabling this option should be avoided because the note will be cut at the end of line. |
Step 7: Press the 'Import' button.
You may need to wait a few seconds or more depending on the complexity and length of the MIDI file.
Step 8: Check the chord detection results and jump to Step 4 if the results are not satisfying.
Click on the 'Composition' tab and check the Master Track chords and the composition structure. If the Master Track chords are too complex, you should exclude a track that does not follow the harmony. This may require some experimenting.
You will see a similar workspace: 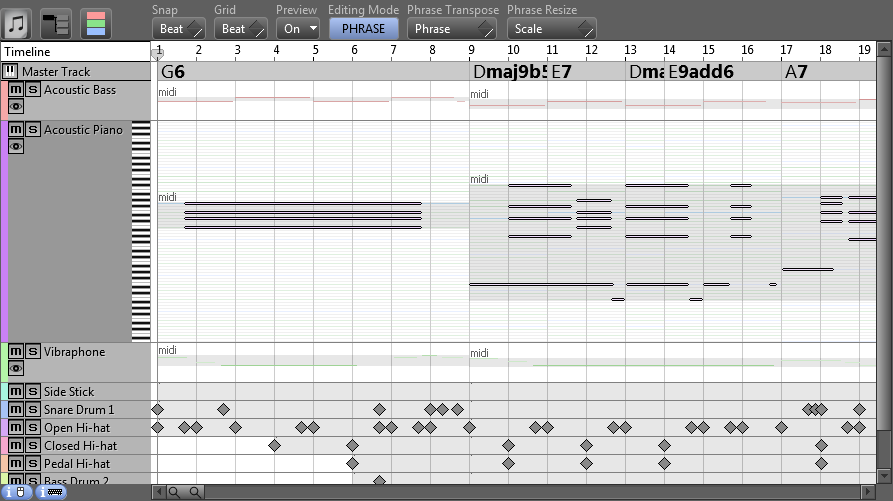 |