In this tutorial using phrase morphing is presented. This powerful feature means that when you place a 'source' and 'target' phrase in the composition, the phrases between the two will be composed automatically by RapidComposer so that there is a smooth transition from the source phrase to the target phrase.There are several options to control this transition. Usually there are many possible transitions, if you don't like the one offered by the program, pressing 'Regenerate' will create a different transition.
Step 1: Start a new composition.
Press Ctrl-N/Cmd-NOR
Press the 'Files' button:
 .
.Click on 'New Composition':
 |
Close the panel.
Step 2: Add a new line.
Press the 'Structure' button: .
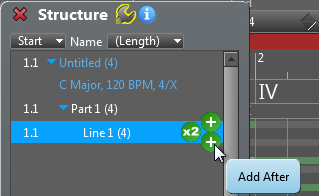
.Select 'Line 1', and click on the bottom 'plus' icon as shown on the image:
 |
You will see this:
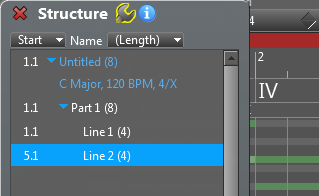 |
You can close the panel as it is not needed now.
Step 3: Zoom out the timeline.
Ctrl-click on the timeline, and drag the mouse horizontally until you see 8 bars:  |
You should see this:
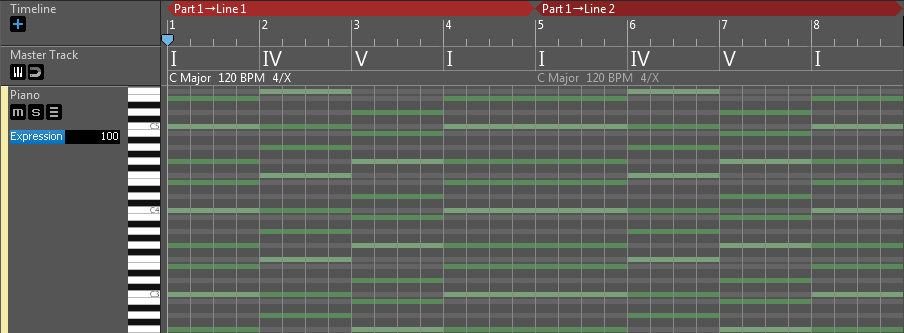 |
Step 4: Select 'Nylon Guitar' as the instrument.
Since we will work with acoustic guitar patterns, select 'Nylon Guitar' as the instrument.
Right-click on the track header to open the track inspector.
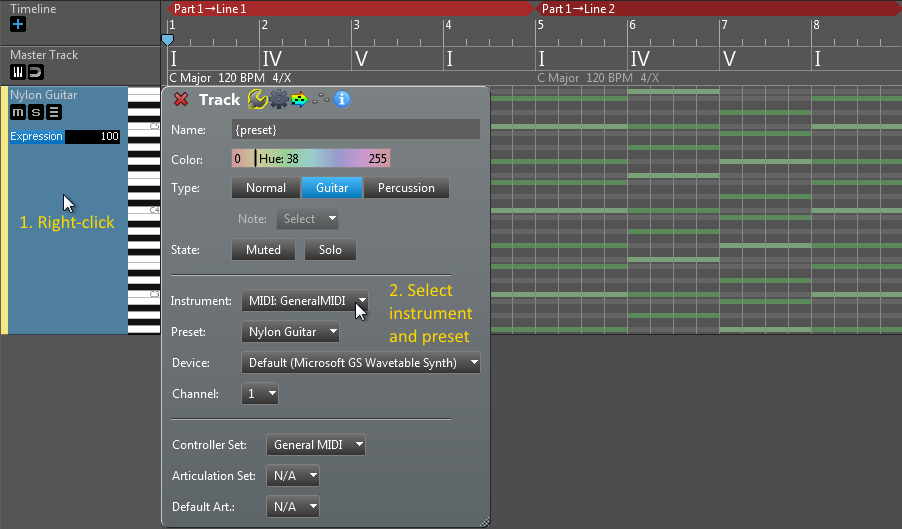 |
Select 'MIDI: GeneralMIDI' as the instrument, and 'Nylon Guitar' as the preset. You can use the included GeneralUser GS soundfont.
Note: you can choose a different instrument, but make sure 'Use Guitar Chords' is checked in the 'Track Hints' menu. This means that acoustic guitar chords will be used in this track.
Step 5: Add the source phrase at the beginning.
We will make a transition from 'FingerPicking4' to 'FingerPicking1' in this example.Press the 'Phrase Browser' button:
 .
.Move the phrase browser to the center of the window because we will add one phrase to the beginning and another to the end of the track. Click on 'FingerPicking4', drag and drop it to the beginning of the track:
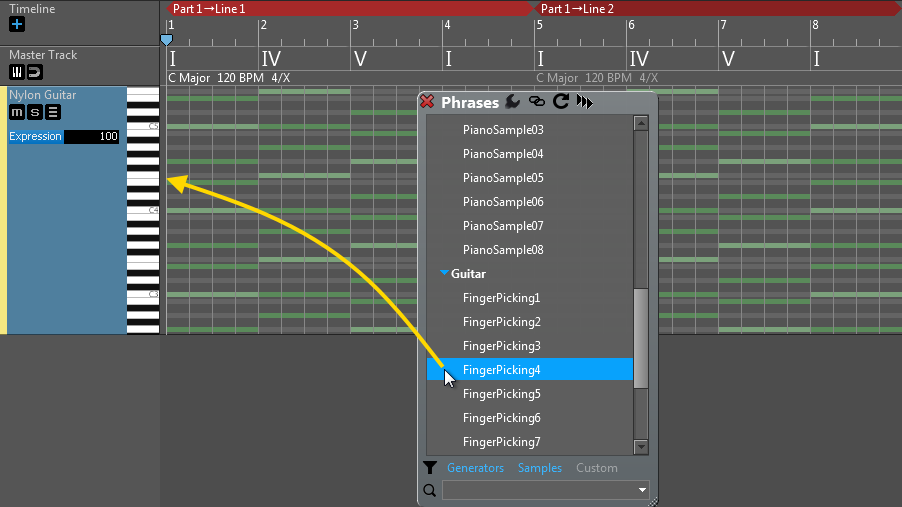 |
Result:
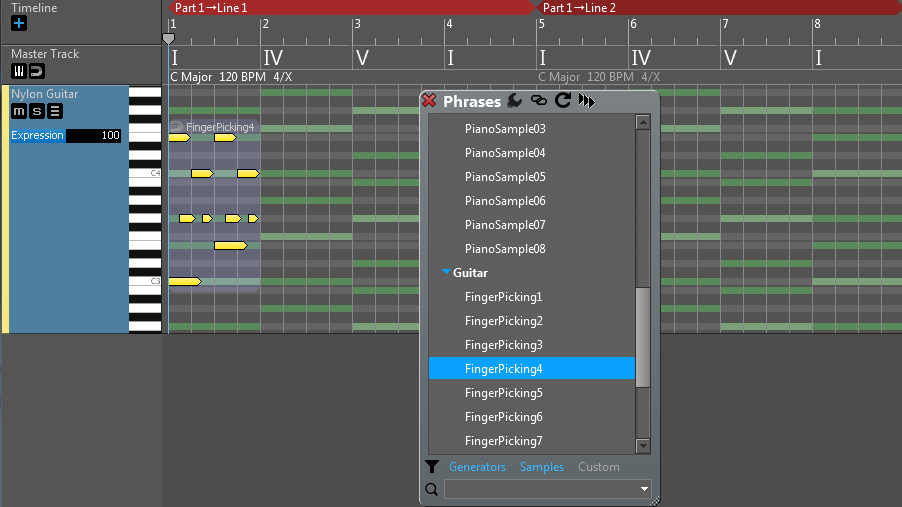 |
Sometimes it is easier to double-click on the workspace to add a phrase. So you may double-click at position 1 on the workspace to insert 'FingerPicking4'.
Step 6: Add the target phrase at the end of the track
Now click on 'FingerPicking1', drag and drop it to the end of the track (at beat 29): 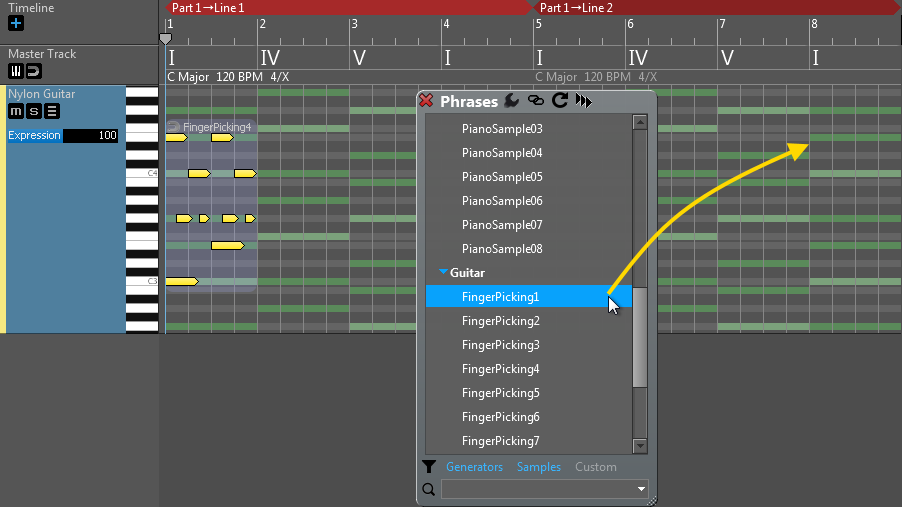 |
Result:
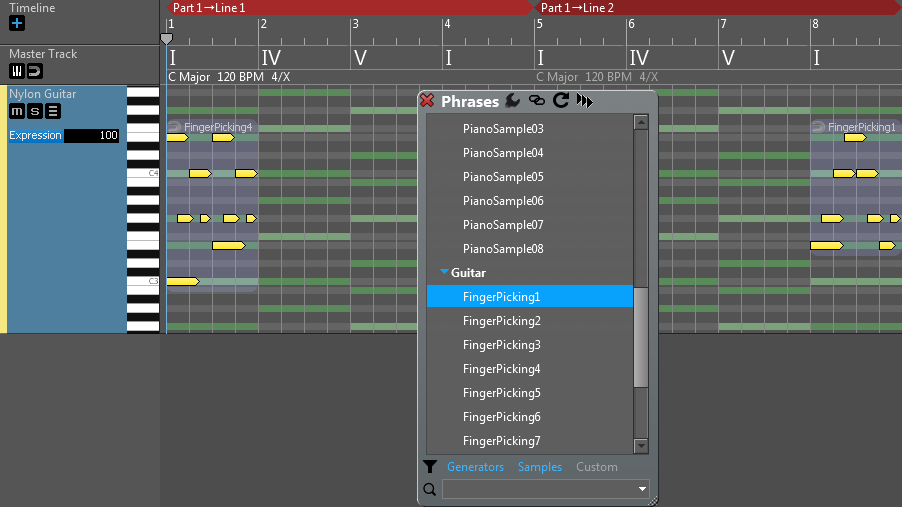 |
Step 7: Add the Phrase Morpher between the source and target phrases
Method 1: drop the 'Phrase Morpher' at beat 5
Now click on 'Phrase Morpher' in the Phrase Browser, drag and drop it immediately after the first phrase (at beat 5): 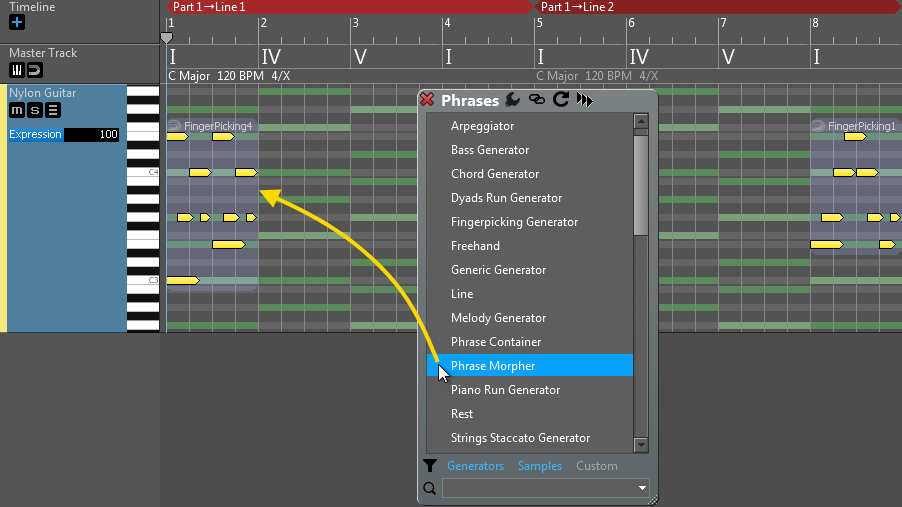 |
Result:
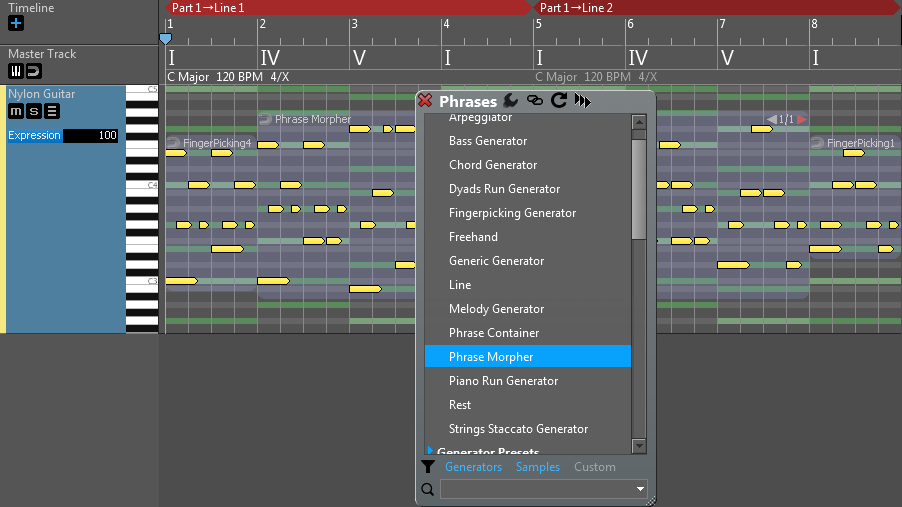 |
Method 2: pressing the 'Morph Between 2 Phrases' button
Select the source and target phrase. Right-click on any phrases to open the Phrase Inspector. When exactly two phrases are selected, you will find a 'Morph Between 2 Phrases' button in the Phrase Inspector: 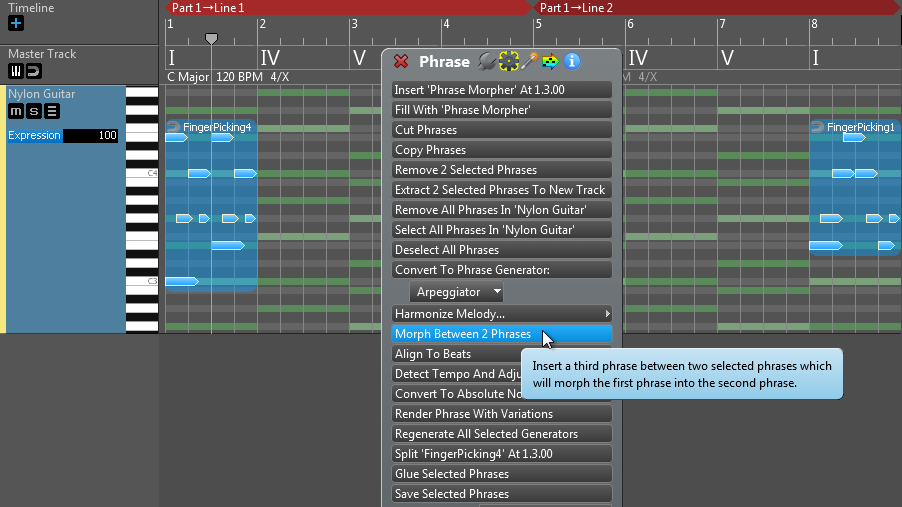 |
Pressing that button will automatically insert a Phrase Morpher between the two phrases:
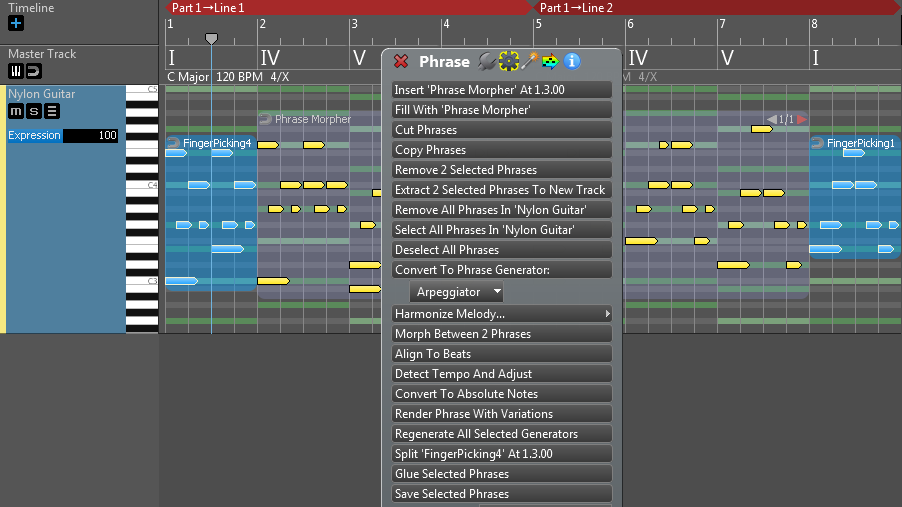 |
The phrase morpher is added between the source and target phrases, and is filled with generated notes.
You can press the 'PLAY' button to listen to the track.
Step 8: Change options and regenerate
Once you set up the phrase morpher, you can transpose or completely replace the source and target phrases. The phrase morpher will be automatically recalculated in these cases. Phrase Morpher has a few parameters that influence the way notes are generated.
Right-click on the Phrase Morpher to open the Phrase Inspector. Click on the small 'magic stick' icon at the top of the inspector to show the generator parameters.
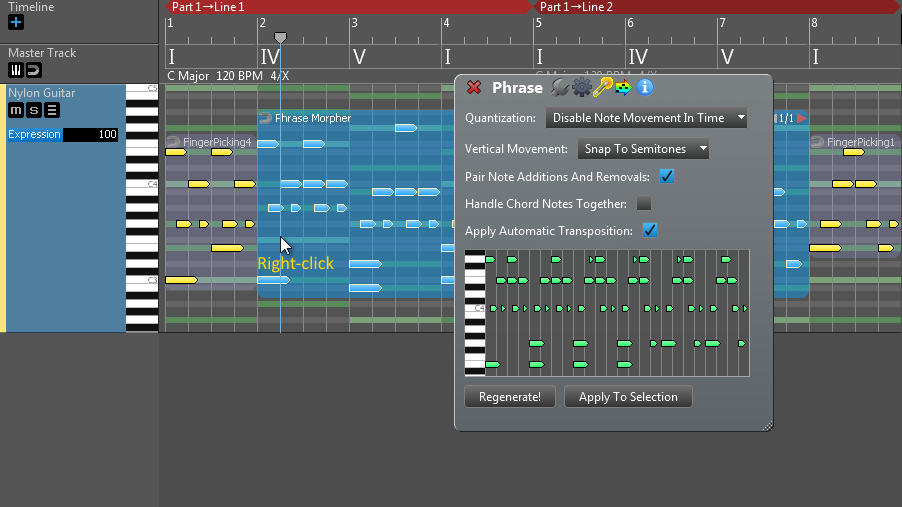 |
Options and explanations:
| Quantization: | Horizontal note movement control. Specify if you allow notes moving in time and if so how they are quantized. Notes moving in time will change the rhythm, so if that is not what you want it is best to disable this option. |
| Vertical Movement: | Vertical note movement control. Specify if you allow notes moving vertically (becoming higher or lower notes) and if so how they are handled. Moving notes can be snapped to scale notes or semitones. |
| Pair Note Additions And Removals: | When checked adding a target note and removing a source note will happen at the same time as much as other conditions allow. This results a smoother transition. |
| Handle Chord Notes Together: | When checked chord notes with no offset will be added/removed together. |
| Apply Automatic Transposition: | Specify if transposition is applied to the generated phrases. When checked the highest note of the source phrase will approximate the highest note of the target phrase. This setting is ignored when guitar chords are used. |
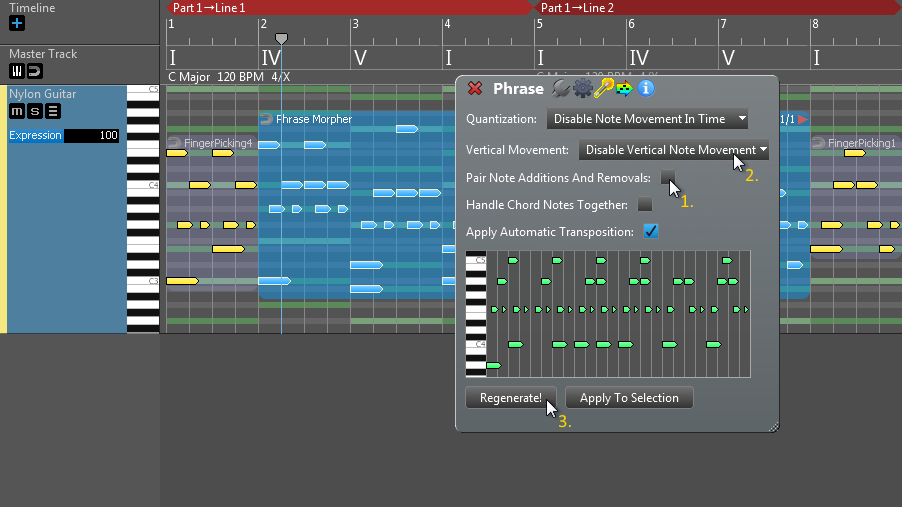
If you change any of the above options, the preview is updated. In this tutorial we disabled the 'Vertical Movement' and 'Pair Note Additions And Removals' options. You can press 'Regenerate' if you want to see another transition:
 |
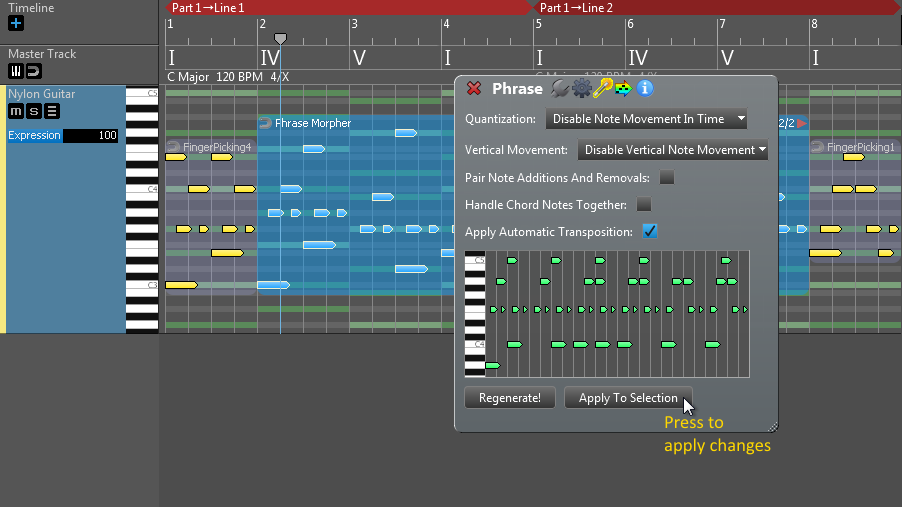
Pressing 'Apply To Selection' will replace the phrase in the composition:
 |
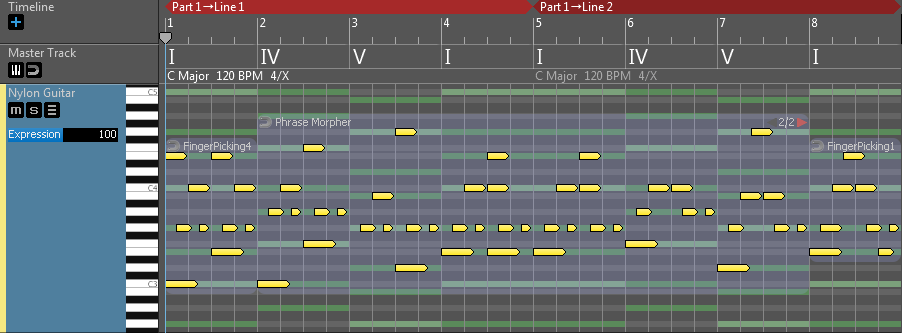
If you close the Phrase Inspector you should see something like this:
 |